

Here’s a simple solution for redirecting one domain name to another, even when the redirected domain name does not have any website hosting. We’ll also show you how to include all subdomains in your redirect so that the rule applies to whatever.example.com or www.example.com as well as just example.com.
Why might you want to do this?
In our case, we have a domain name that we’re sitting on for use in a future project. If someone tries to visit the domain name, we want them to be taken to our business website so that they know who manages the domain name and aren’t met with a “server not found” error. We want all subdomains to be redirected too.
You might also want to do this if you have a domain name that you’re only using for a custom email address and not for a website, but still want the domain name to lead somewhere when someone types it into their browser’s address bar. For example, you might want it to lead to your social media profile or to another website you own.
How to set it up
We’re using Cloudflare to accomplish this, so you’ll need a Cloudflare account, and you’ll need to have updated your domain registrar’s nameservers with Cloudflare’s. We’re using the example domain name example.com and redirecting to our website oddly.digital. Obviously, use your own domain names when following this guide.
Step 1: Adding “dummy” DNS A records
Even though we don’t have a website host for our domain name, Cloudflare still requires the domain name to have a proxied DNS A record containing a valid and resolvable IP address. So, we’re going to add one using a “dummy” IP address.
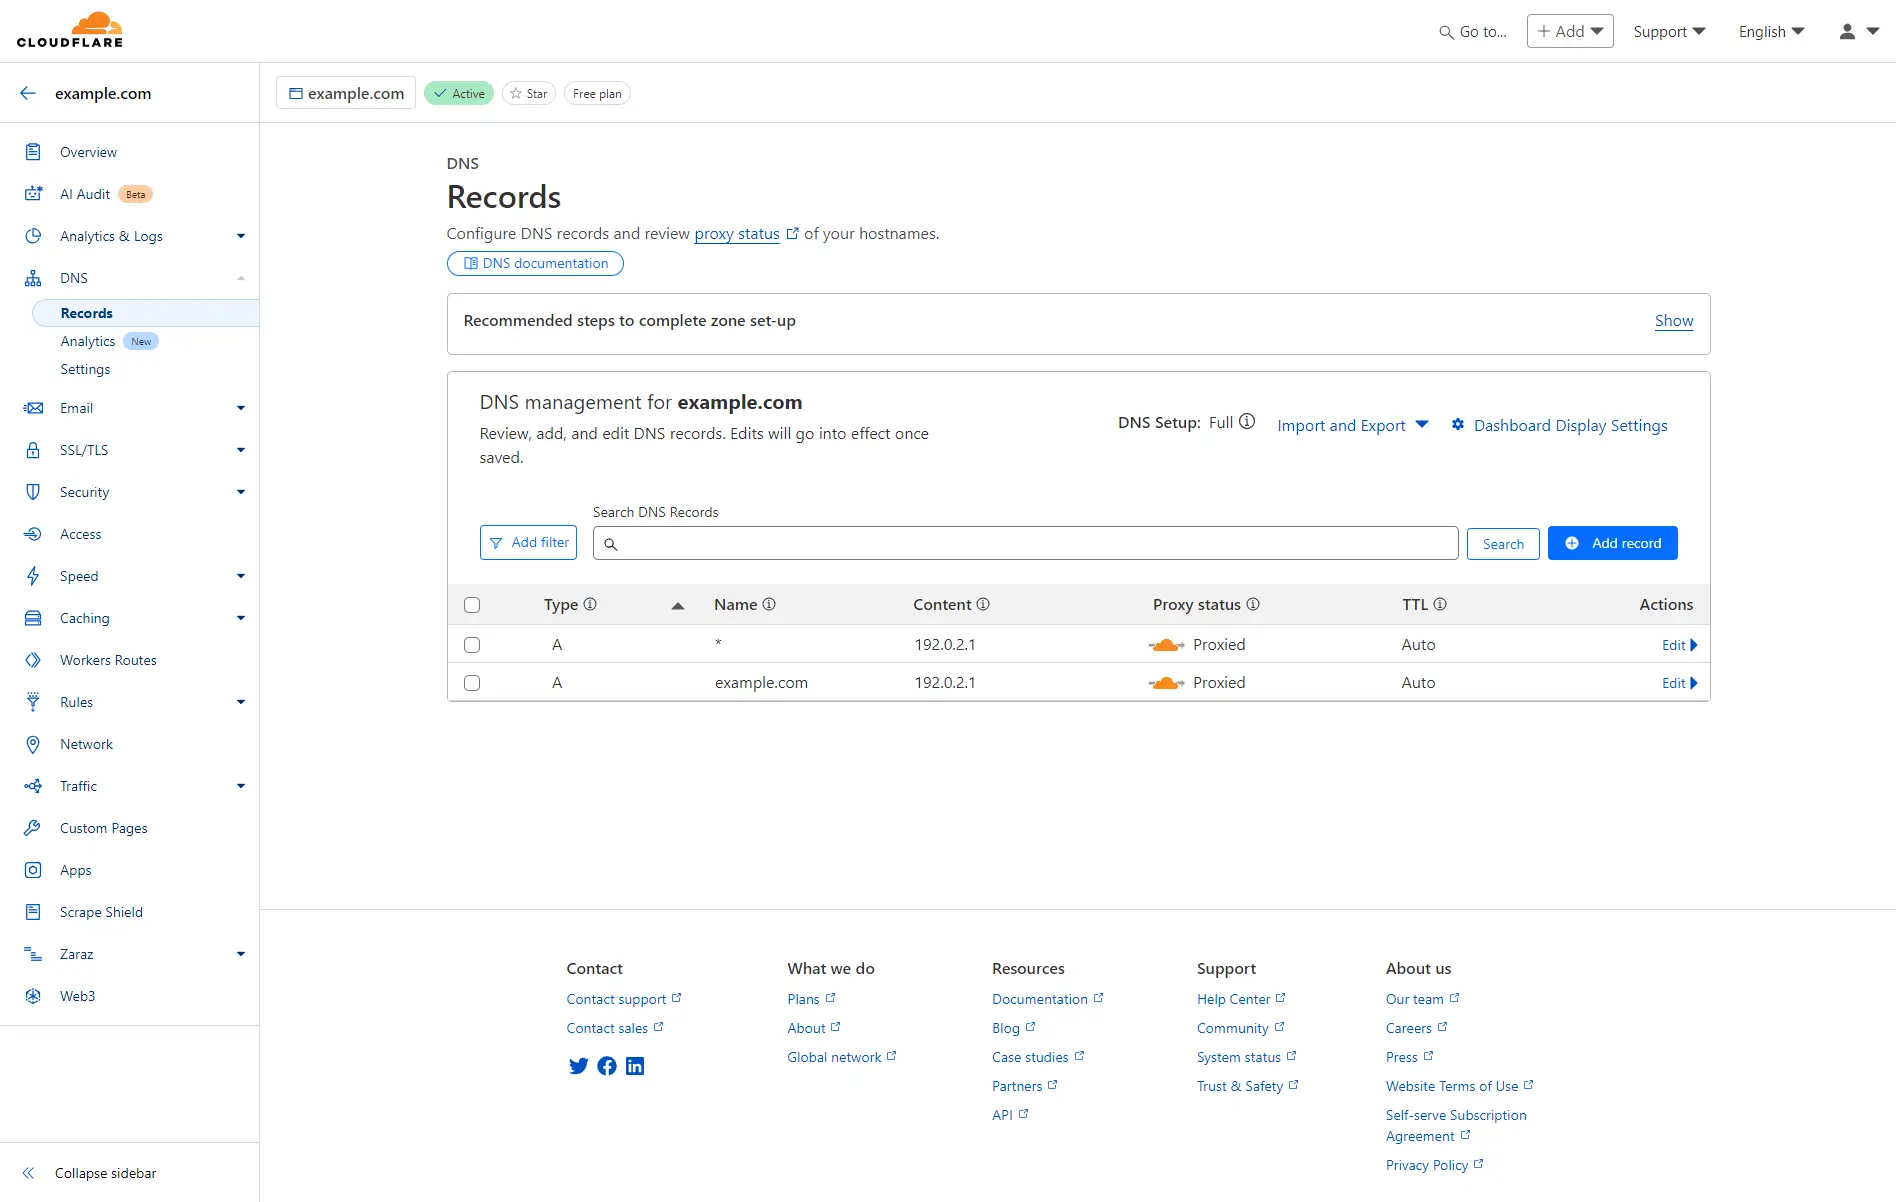
- On the Cloudflare account home page, select your domain and then click DNS.
- Add the following DNS records (replacing example.com with your own domain name). If you don’t want to redirect subdomains then only add the first record:
Type: A
Name: example.com
Content: 192.0.2.1
Proxy status: Proxied
Type: A
Name: *
Content: 192.0.2.1
Proxy status: Proxied
The IP address 192.0.2.1 is part of a block of IP addresses reserved for example purposes and which aren’t routable on the public internet. This makes them ideal for our use case and means we don’t have to worry about the security implications of pointing our domain name to an IP address which we don’t control.
If you wanted to redirect specific subdomains instead of all subdomains then instead of adding the second wildcard DNS record, you would add a record for each subdomain you want the redirect rule to apply to. For example, to apply the redirect rule to the subdomain www.example.com, you would add the following record:
Type: A
Name: www
Content: 192.0.2.1
Proxy status: Proxied
Step 2: Setting up the redirect rules
Now that the DNS records have been added, it’s time to set up the redirect rules.
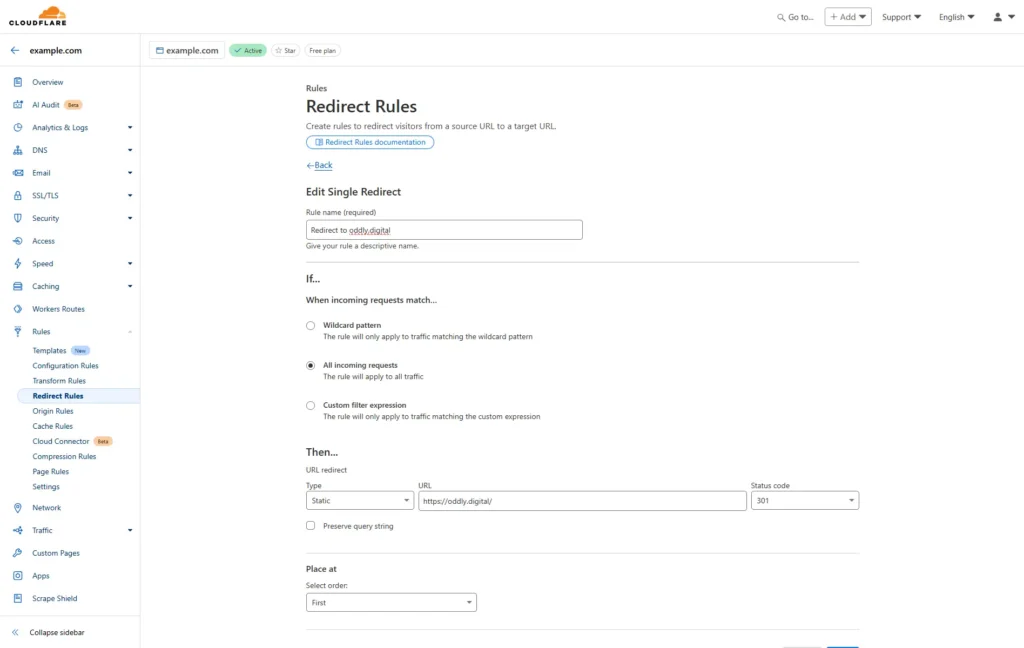
- Go to Rules > Redirect Rules and click Create Rule.
- Give your new rule a name (we used “Redirect to oddly.digital”).
- Select All incoming requests.
- For the URL redirect, enter the following:
Type: Static
URL: https://oddly.digital/
Status code: 301
- Click Save to deploy your redirect rule.
That’s it!
Sometimes it can take a few minutes, but you should now find that when you enter your domain name into the address bar you are redirected to the URL you specified in the redirect rule.
If you need help with this or are in need of a website, are looking for reliable website maintenance and support or have any other website-related tasks, then get in touch! We can make your life easier.
If you’re on one of our managed website packages, then we handle your DNS records for you, so you never have to worry about any of this.


Leave a Reply